NMR Facility

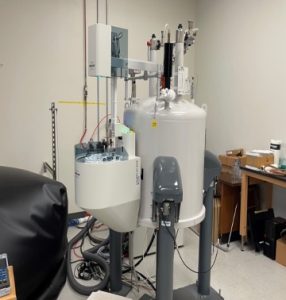
 Bruker AVANCE NEO 500 MHz
Marsico Hall Room SB205
- Bruker 500 MHz NMR Probes
- 5 mm Cryo Probe Prodigy with high sensitivities on both high band 1H/19F channel and broad band 31P – 15N channel
- 5 mm iProbe, a spare broadband probe with 1H on one channel and 19F, 31P-15N on the second channel
- NMR experiments
- 1D 1H, 19F, 1D X{15N – 31P}
- 2D 1H-1H COSY, TOCSY, NOESY, ROESY,
- 2D 1H-X{15N – 31P} HSQC, HMBC
- Many other experiments, like APT, DEPT, etc.
- relaxation experiments
- Equipped with Bruker Sample Case Plus (60 positions)
 Agilent 400 INOVA NMR
Marsico Hall Room SB205
- Inova 400 Probe
- 5mm AutoX PFG
- NMR experiments
- 1D 1H, 13C
- 2D 1H-1H COSY, TOCSY, NOESY, ROESY
- 2D 1H-13C HSQC, HMBC
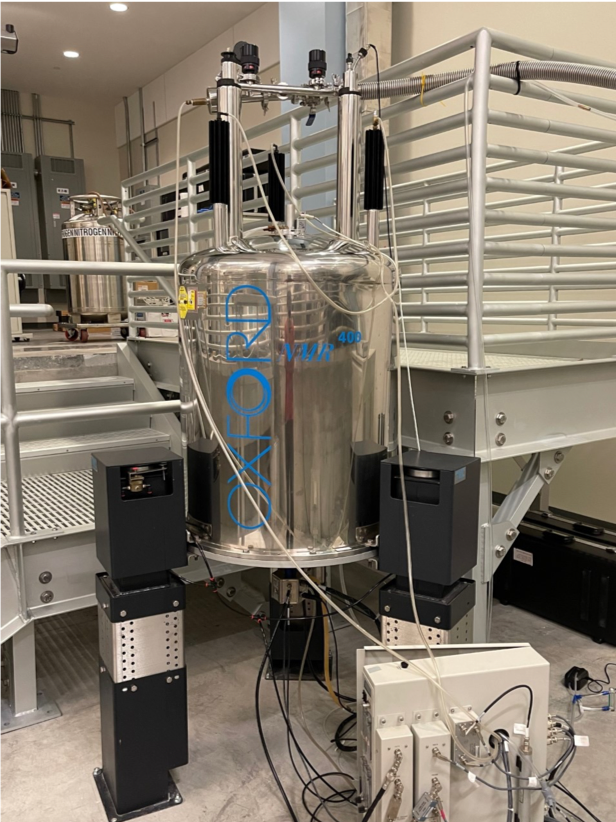
 Bruker AVANCE NEO NANO 400 MHz
Marsico Hall Room 3218
- Bruker 400MR Probe
- 5mm iProbe, a broadband probe with 1H in one channel and 19F, 31P-15N in second channel
- NMR experiments
- 1D 1H, proton decoupled 19F, X{15N – 31P}
- 2D 1H-1H COSY, TOCSY, NOESY, ROESY
- 2D 1H-X{15N – 31P} HSQC, HMBC
-
Many other experiments, like APT, DEPT, etc.
- Relaxation experiments
- Equipped with Bruker Sample Case Plus (60 positions)
Fee Structure
Bruker 500
- $13/hour
Inova 400
- $12/hour
Bruker 400
- $13/hour
Non-UNC Usage
Bruker 500 and Bruker 400
- $60/hour
Inova 400
- $50/hour
Consultation
- $25/hour
Training
- $75 for each instrument
- $100 for 500 Bruker and 400 Bruker
Scheduling
Bruker 500
Available on walk-up, no appointment. Day time weekdays Mon through Fri from 8 to 6, one hour limit for each experiment.
Inova 400
Appointment required on the instrument calendar.
Bruker 400
Available on walk-up, no appointment. Day time weekdays Mon through Fri from 8 to 6, half an hour limit for each experiment.
Pulse Width and Power Calculations
In order to prevent expensive damage to the probes or associated electronics, care must be excercised in setting power levels and pulse widths. For our Inova 500 spectrometer, maximum power corresponds to a setting of 63 dB. (Note that Varian follows the convention that increasing dB represents increasing power.) For 1H this represents 50 W; for 13C or 15N, however, 63 dB corresponds to an output of 300 W. Knowing this, the power can be calculated at any setting using the following equations:
dB(final) – dB(initial) = 10 log { power(final) / power(initial) }.
For example, we can calculate the power used if the 1H channel is set to 60 dB:
60 – 63 = -3 = 10 log { x/50 }
-0.3 = log { x/50 }
10 e -0.3 = antilog ( log {x/50})
50 ( 0.50 ) ~ 25 W
Since pulse widths are proportional to the voltage in the probe coil, and power is proportional to the square of the voltage (or current), we should be able to calculate the pulse width at a different power level. Since Varian uses the convention that increasing the dB increases the power, rather than attenuating the power, we have:
dB(final) – dB(initial) = 20 log { pw(initial) / pw(final) }.
For example, if the 1H pw at 51 dB is 9.4 usec, we can calculate the pw at 45 dB:
45 – 51 = -6 = 20 log { 9.4/x }
-0.3 = log { 9.4/x }
10 e -0.3 = antilog ( log { 9.4/x })
x = 18.775 ~ 18.8 usec
Thus, a change of 6 dB corresponds to a 2-fold change in pulse width, but a 4-fold change in power.
Note that for our 1H amplifier 1 W corresponds to a dB setting of ~ 46 dB, whereas 1 W would correspond to ~38 dB for our 13C / 15N amplifiers.
Gradient Mapping and Shimming Instructions
In the VNMR input window type: gmapsys
The menu buttons will change in response to this. With the left mouse button click on the one labeled: Set Params
The menu buttons will again change; click on the one labeled: Gradient,Nucleus
The buttons will change again. Depending upon whether you will make a map using 1H (which is preferred, since it has a much larger signal) or 2H, click on either: Pfg H1 or Pfg H2.
In the VNMR Status Window the following message will appear: Parameters set for pfg on H1 (or H2, depending upon which you selected above), check gradtype
When you type: gradtype? in the VNMR status window, it should respond with: gradtype=’ttt’ which corresponds to our hardware.
You might also make sure that the gradients are turned on by typing: pfgon? (normally it should respond with pfgon=’yyy’, indicating that the x,y, and z gradients are on.)
To check how many gradients will be used for mapping/shimming, type: gzsize? The default for our Inova 500 is 6; if the sample is short you may want to set gzsize=5
If you selected 2H the default settings and nt=4 can be used for mapping. If you are using 1H you should set the gain=0 and tpwr=52 (or less) so the signal is not so great that the images are distorted; nt=1 is sufficient.
Click on the button labeled: Return
The buttons will change; click on the button labeled: Go, dssh
This will result in a pair of images being produced and displayed. Type: ds(1) and then type: f full to display the first of the pair. (You may also need to type: vp=0 and then vsadj).
Click on the button labeled: Th
This will display a horizontal yellow line; with the left mouse button, position this at the top of the displayed image, and then in the VNMR input window type: th=th*0.2 The line will then be positioned at the level corresponding to 20% of the height.
With the left mouse button, position one red vertical line at the left intersection of the image and the threshold you’ve just set, and with the right mouse button position the other red vertical line at the right intersection. (Be careful not to move the left line while positioning the right.)
In the VNMR input window type: gmapsys again. The buttons will change, and again click on the one labeled: Set Params
The buttons will change; click on the one labeled: Calculate gzwin
In the VNMR Status Window a message will appear, similar to: Cursors used to set gzxwin to 29.3, tof to -769.6
Click on the button labeled: Return
The buttons will change; click on the one labeled: Shim maps
The buttons will change; click on the one labeled: Make Shimmap
In the VNMR Status Window a message similar to this will appear: Eneter mapname:[last map name]
Type in the name you wish to call this shimmap. When you hit “Enter” on the keyboard, a shimmap will be made. (When done you will see pairs of images, the number equal to gzsize + 2.)
Click on the button labeled: Return
The buttons will change; to see the shimmap, click on the menu button labeled: Display
The buttons will change; click on the one labeled: Display shimmap which will then be displayed (a set of curves equal to gzsize; the power of the polynomial corresponds to the Z shim; i.e., Z1 is a straight line, whereas Z2 is a parabola, and so forth.)
Click on the button labeled: Return
The buttons will change. Then click on the button labeled: Autoshim on Z
Gradient shimming will commence, using the map that you just made. Iterations will be performed using only gradients Z1, Z2, Z3, and Z4 until the rms error is less than one; it will then begin again using shims Z1-Z6 (or Z1-Z5, if you set gzsize=5). This is done so that Z5 and Z6, which are “weaker”, will not be “swamped” by Z1-Z4. In earlier versions of the software, one had to first type in the VNMR Input Window: gmap_z1z4=’y’ before starting Autoshimming.
When finished, clik on the button labeled: Quit
This will return you to the original experiment display from which you began.
Local Links
- The University of North Carolina
- UNC Eshelman School of Pharmacy
- UNC Medical School NMR Laboratory
- UNC Department of Chemistry NMR Laboratory
- Duke NMR Laboratory
- NCSU NMR Laboratory
Databases
- UNC Libraries Home Page
- PubMed
- PDB
- BMRB-BioMagResBank
- NMR Information Server
- spectroscopyNOW.com
- SDBS-Integrated Spectral Data Base System for Organic Compounds
Educational
- The Basics of NMR-Joseph P. Hornak, Ph.D.
- Lectures by James Keeler
- Biophysical Society Educational Resources
- Structure Determination of Proteins with NMR Spectroscopy by H.J. Schirra